Back to TheWorxHub for Senior Living Main Menu
Printing Barcodes
Watch the Video Tutorial:

- Click on the Actions tab and select the Barcoding tab.
- Choose the item you need to generate barcodes for by selecting the item from the menu on the left side of the page.
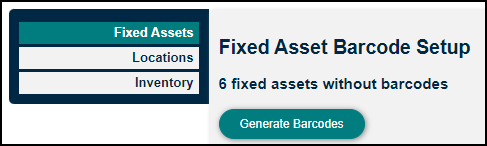
- If you have not already done so, click the Generate Barcodes button to generate a barcode for each item. *Note: Be sure to update assets, locations, and inventory items with identifying information before generating barcodes.
- Choose the Label Template. Each of the options requires a laser printer. If you only have a deskjet printer, there are nearly identical labels available in a less durable format. If temperature or moisture are not a concern, try Avery 6571, Avery 6572 and Avery 6570 as alternatives.
- Avery 6578 - At about ¾ the size of a credit card, this is the largest label option and by far the best one for labeling back-office equipment where you're not too worried about appearance. Because of its size it's easier to scan from a distance or in poor light situations. If you have the space to place this label, this is the most user-friendly choice.
- Avery 6576 - This small label is great for placing in discrete locations. Because of its narrow width, this label can work on some curved surfaces like chair or table legs or where you don't have room for the longer 6577 label.
- Avery 5520 - This label is the most weatherproof and durable label. They resist moisture, scuffing, tearing, and smudging. This label is best for outdoor items.
- Avery 6577 - This long and narrow label is great for placing in discrete locations. Label door jambs, the edge of an oven door, furniture, inventory shelves, and anywhere space is tight.
- Select the Start From Position. *Note: This defaults to position #1. You only need to change this if you're using a half-used label sheet. Click the Show position numbering link to understand what position number you should use for the selected label type.
- Click Print Labels. After you click the Print Labels button, TheWorxHub creates a printable PDF file containing all of your barcodes. Your printable file will show up in a pop-up window in your browser, or in an external PDF viewer such as Adobe Reader.
Bright Idea:
It's important that your print job not be resized in any way before printing. Some programs will provide an option to Fit to Page, Page Scaling, or Scaling Type when you print the file. Ensure Page Scaling is set to None or Fit to Page is unchecked.
- Once your barcode labels open in the printable file, another prompt appears in TheWorxHub asking if your barcodes printed correctly. TheWorxHub is keeping track of what barcodes you've already printed to help identify which assets, locations, and inventory are not yet labeled with barcodes.
- If your labels don't print correctly, click No.
- If they print correctly, then click Yes so TheWorxHub can identify those items as already printed.
Bright Idea:
- Printed Asset barcodes are grouped by: Location, Category, then Asset Number. This helps you take your sheets
of labels to a location and label all items that are in close proximity. - Printed Inventory barcodes are grouped by: Storage Location, Bin/Shelf, Category, then Part #. This means you can go to a storage location and easily apply barcode labels to all bins and shelves in that location.
- Printed Location barcodes are simply grouped alphabetically by the full location name.
